Help Center ▸ Integrations ▸ Facebook Passing Events to Facebook
Note: You must have the Facebook Pixel installed on your website in order to pass events into Facebook.
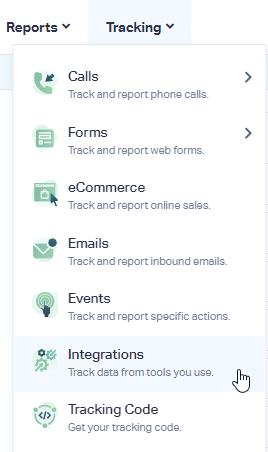
1Log into the WhatConverts Profile you want to pass Facebook Events from. Click "Tracking" in the top menu. Select "Integrations".
2Click "Connect" in the Facebook module. Select "Enabled" and click "Update Integration".
Note: This will turn on the ability to capture the _fbp (Facebook Browser ID) and _fbc (Facebook Click ID) cookies with your WhatConverts Leads. In order to capture these cookies with your leads, you must have your WhatConverts tracking code installed on your website and any tracking numbers also need to be inside of Dynamic Number Pools.
2Go to your website; fully refresh your website (and clear any caching plugins if you have them installed on your website) and submit a new lead to your WhatConverts profile (place a call to the tracking number you see on the page or submit a form that you're currently set up to track).
3Log into Zapier and click "Create Zap". Select "WhatConverts" as your Trigger App and "New Lead" as the Trigger Event. Choose or connect your WhatConverts account and click "Continue".
On the Set up trigger page, select "Yes" only for the Lead Types you would like to send to Facebook. Select your profile from the drop down and click "Continue". Select "Test Trigger". Once the test is successful, make sure the lead you are using to set up the Zap is the most recent lead and click "Continue".
Note: For Phone calls and/or Chats, make sure to select "Yes" for only one of the Phone Call options to eliminate duplicates from being sent into Facebook.
- Phone Call (Completed): Sends the lead once the Phone Call has finished
- Phone Call (Modified): Sends the lead when a phone call is in progress and the lead in WhatConverts is modified.
- Phone Call (In Progress): Sends the lead when a phone call has begun. This is the option to use if you would like your agents to update the CRM while they are on the phone with the caller.
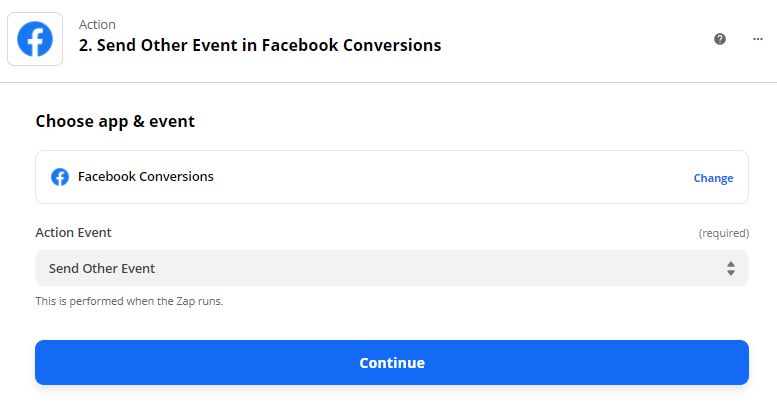
4Add "Facebook Conversions" as the Action App and "Send Other Event" as the Action Event. Click "Continue.
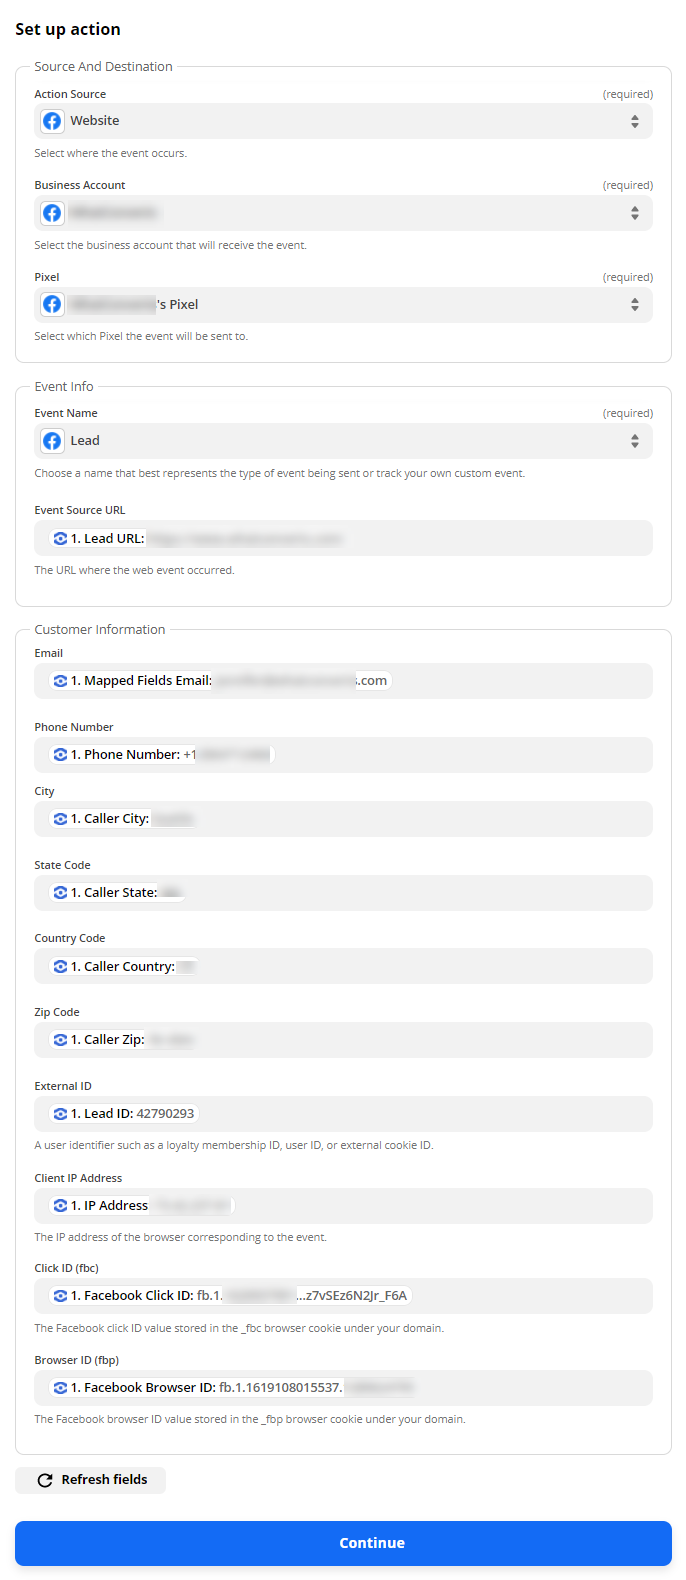
Connect your Facebook Business account to Zapier and continue to the Set up action page:
Under Source and Destination:
Action Source: Website
Business Account: Select your Facebook Business Account from the drop-down.
Pixel: Select your Facebook Pixel from the drop-down.
Under Event Info:
Event Name: Lead
Event Source URL: Lead URL
Under Customer Information:
Email: Mapped Fields Email
Phone Number: Phone Number or Mapped Fields Phone Number
External ID: Lead ID
Client IP Address: IP Address
Click ID (fbc): Facebook Click ID
Browser ID (fbp): Facebook Browser ID
If you have additional customer information that you are tracking in WhatConverts that you would like to pass to Facebook, you can also include those where the Facebook template asks.
Click "Continue".
On the Test Action page, click "Test and Continue". Once your test is successful, turn your Zap "On".
If you have any questions, please contact us here: Contact WhatConverts Support or email support@whatconverts.com
You can use Zapier to pass events back into Facebook as your leads are tracked in WhatConverts.
Note: You must have the Facebook Pixel installed on your website in order to pass events into Facebook.
1Log into WhatConverts. Navigate to the profile you'd like to pass events from. Under Profile, select "Integrations" then "Facebook".
For the Facebook Enabled drop-down, select "On" and click "Update".
Note: This will turn on the ability to capture the _fbp (Facebook Browser ID) and _fbc (Facebook Click ID) cookies with your WhatConverts Leads. In order to capture these cookies with your leads, you must have your WhatConverts tracking code installed on your website and any tracking numbers also need to be inside of Dynamic Number Pools.
2Go to your website; fully refresh your website (and clear any caching plugins if you have them installed on your website) and submit a new lead to your WhatConverts account (place a call to the tracking number you see on the page or submit a form that you're currently set up to track).
3Log into Zapier and click "Make a Zap". Select "WhatConverts" as your Trigger App and "New Lead" as the Trigger. Connect your WhatConverts account and continue to the Customize Lead page.
On the Customize Lead page, select "Yes" only for the Lead Types you would like to send to Facebook. Select your profile from the drop down and click "Continue". Select "Test and Review". Once the test is successful, make sure the lead you are using to set up the Zap is the most recent lead and click "Continue".
Note: For Phone calls and/or Chats, make sure to select "Yes" for only one of the Phone Call options to eliminate duplicates from being sent into Facebook.
- Phone Call (Completed): Sends the lead once the Phone Call has finished
- Phone Call (Modified): Sends the lead when a phone call is in progress and the lead in WhatConverts is modified.
- Phone Call (In Progress): Sends the lead when a phone call has begun. This is the option to use if you would like your agents to update the CRM while they are on the phone with the caller.
4Add "Facebook Conversions" as the Action App and "Send Other Event" as the Action. Click "Continue.
Connect your Facebook Business account to Zapier and continue to the Set up action page:
Under Source and Destination:
Action Source: Website
Business Account: Select your Facebook Business Account from the drop-down.
Pixel: Select your Facebook Pixel from the drop-down.
Under Event Info:
Event Name: Lead
Event Source URL: Lead URL
Under Customer Information:
Email: Mapped Fields Email
Phone Number: Phone Number or Mapped Fields Phone Number
External ID: Lead ID
Client IP Address: IP Address
Click ID (fbc): Facebook Click ID
Browser ID (fbp): Facebook Browser ID
If you have additional customer information that you are tracking in WhatConverts that you would like to pass to Facebook, you can also include those where the Facebook template asks.
Click "Continue".
On the Test Action page, click "Test and Continue". Once your test is successful, turn your Zap "On".
Was this page helpful?👍Yes
👎No
Get a FREE presentation of WhatConverts
One of our marketing experts will give you a full presentation of how WhatConverts can help you grow your business.
Schedule a Demo 

 Call Tracking
 Form Tracking
 Chat Tracking
 eCommerce
 Agencies
 Marketers
 Franchises
 Businesses
 Hospitality
 Finance and Insurance
 Real Estate
 Automotive
 Health and Wellness
 Doctors and Medical
 Dental
 Plastic Surgeons
 Education
 HVAC and Plumbing
 Lawyers
 Manufacturing
 AgencyAnalytics
 Google Ads
 Acuity Scheduling
 Squarespace
 Zoho CRM
 Salesforce
 Intercom
 Google Analytics
 Facebook Ads
 Pipedrive
 Livechat
 WooCommerce
 Over 1000 integrations
 Help Center
 Blog
Blog API for Developers
 Webinars
 Schedule a Demo
 System Status 100%


