


Add a Field Mapping
Field Mappings help you keep your lead data clean and consistent. When you track forms or sources using different field names, mappings ensure the data appears in the correct columns within the Lead Manager, so you can easily analyze, report, and take action on your leads.
Create a Field Mapping
To create a Field Mapping:
- Open the Profile Settings and click “Field Mapping”.
- Click ”+ Add Field Mapping”.
- Enter a “Field Mapping Name” (e.g., “Service Area”). This will be the field name shown for the mapped field across WhatConverts.
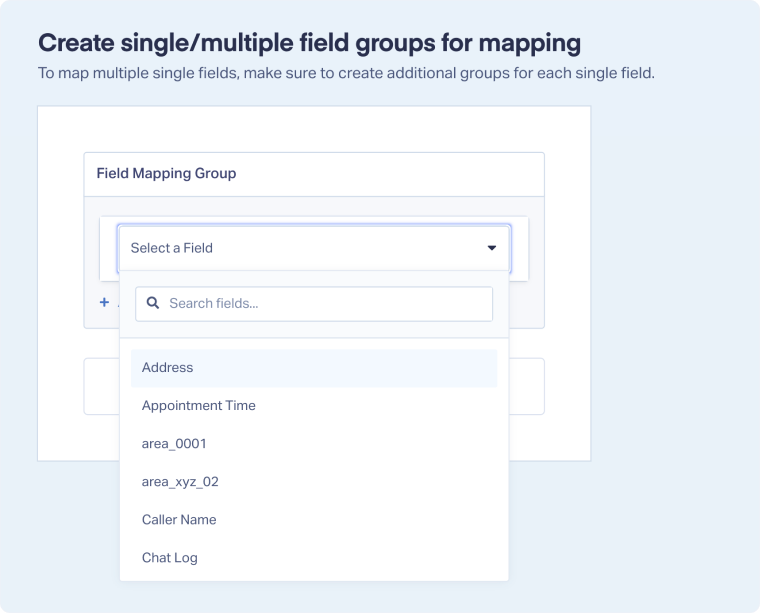
- In the Field Mapping Group, select the field you want to map (e.g. “area_0001”). Only fields that have already appeared in submitted forms, chats, or other lead sources in this profile will show in the list.
- Click “Finish”.
Note: If you’ve already created a Custom Field, a matching Field Mapping is automatically created for it, so you don’t need to map it manually.
Edit a Field Mapping
To update a Field Mapping:
- Go to “Field Mapping”.
- Find the mapping you want to update and click “Edit Field Mapping”.
- Make your changes (e.g., rename the Field Mapping, update the field groups).
- Click “Update Field mapping” to save your changes.
Delete a Field Mapping
To permanently delete a Field Mapping:
- Go to “Field Mapping”.
- Click “Delete Field Mapping” next to the mapping you want to remove.
- Review the confirmation prompt to ensure you're deleting the correct Field Mapping.
- Click “Delete Field Mapping” again to confirm.
Note: When you delete a Field Mapping, all leads using it will be affected. The mapped field will be removed, and each lead will display the original source field name again.
Related Topics
Get a FREE presentation of WhatConverts
One of our marketing experts will give you a full presentation of how WhatConverts can help you grow your business.
Schedule a Demo


