Calendly Integration
Important: If you haven't added your WhatConverts tracking code to your website, add your tracking script. If you are using the WhatConverts WordPress Plugin, you will want to deactivate the plugin and place your WhatConverts Tracking Code above your Calendly Embed Code.
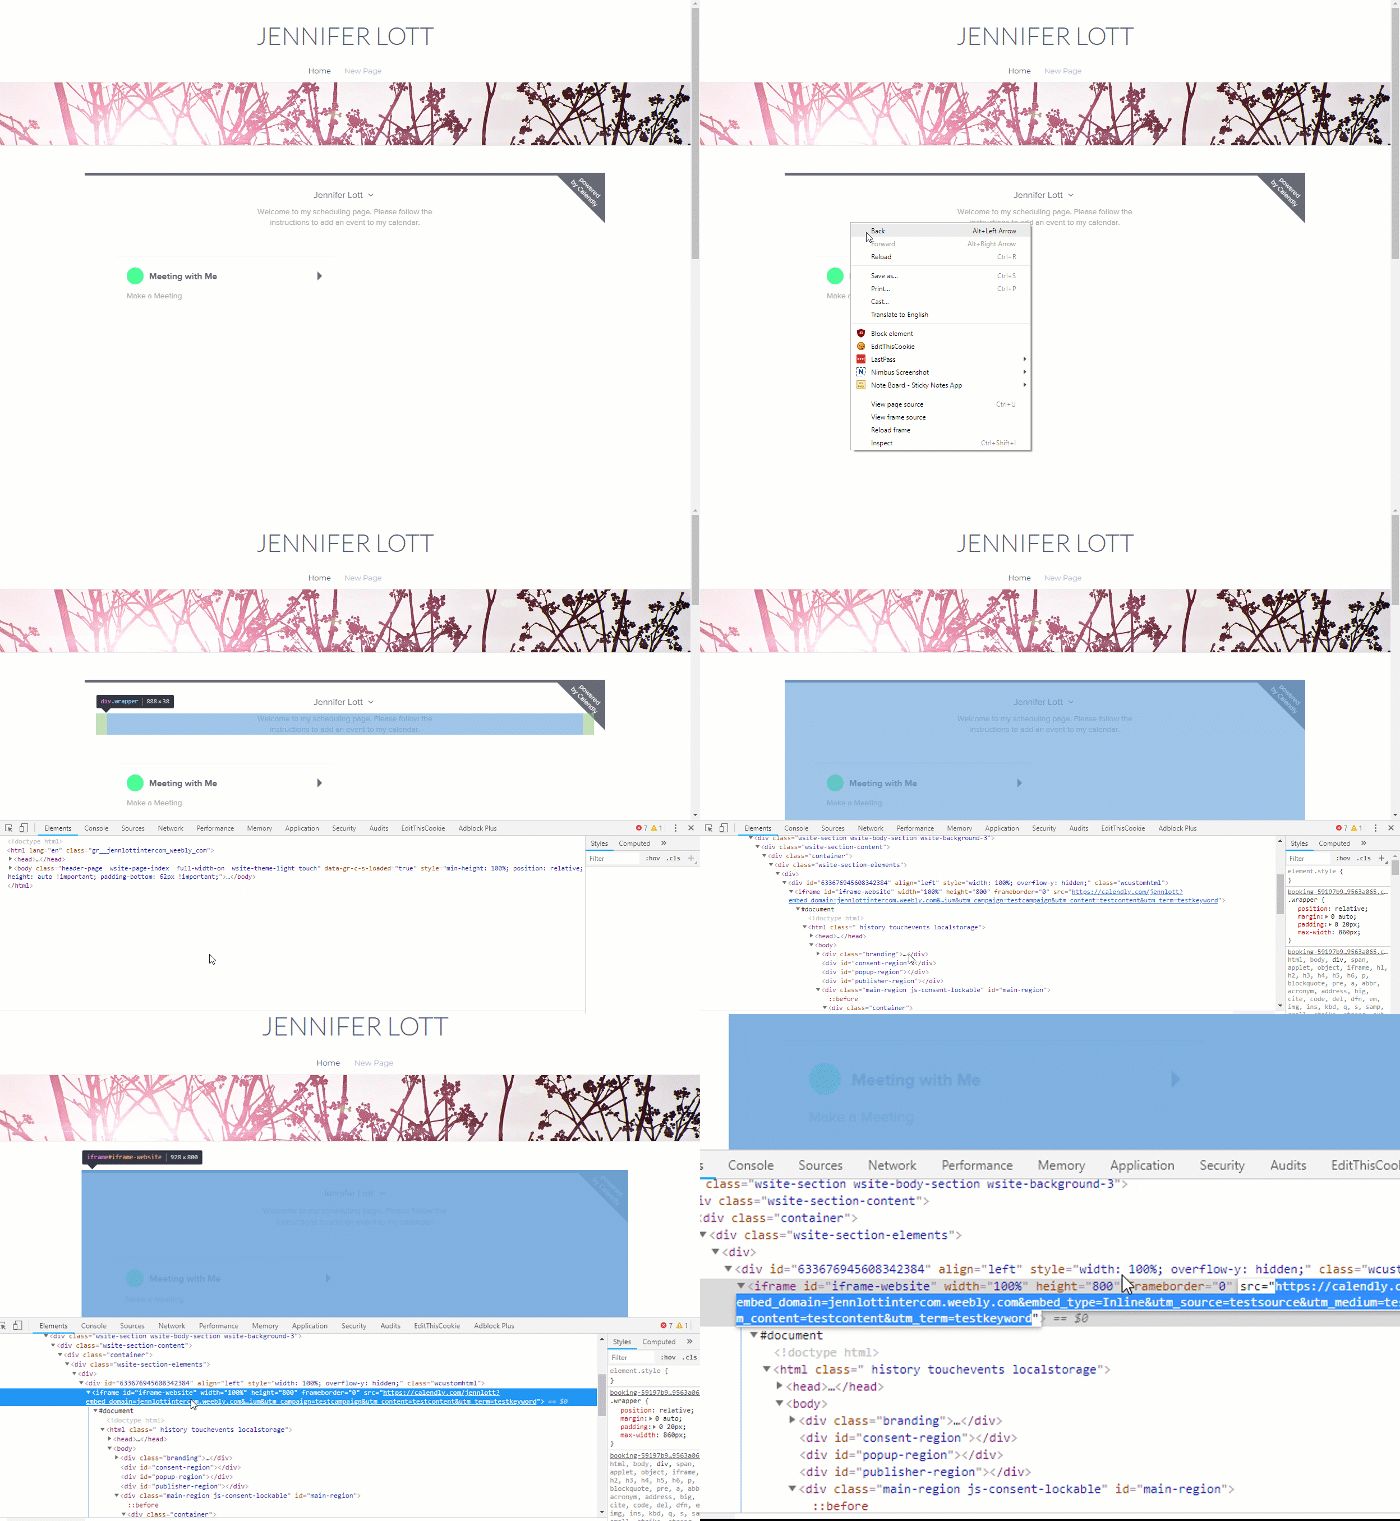
1Go to the page your Calendly appointment scheduler is on. Right-click and select "Inspect". Copy the iframe Source URL. Paste the URL to an empty Text file.
2Paste this code onto the page where your Calendly page is located (replace the Calendly embed code with the copied variables). Make sure to replace TheCopiedIFrameSourceURL with the iframe Source URL from Step 1.
<iframe id="iframe-website" width="100%" height="800" frameborder="0"></iframe>
 <script type="text/javascript">
 wc_iframe_ypbib('TheCopiedIFrameSourceURL','iframe-website');
</script>- Note: Your WhatConverts Tracking Code must be on the page, above your Calendly code.
Refresh your page and submit a test appointment.
3Go to Zapier and create a zap with "Calendly" as your Trigger app and "Invitee Created" as the Trigger Event. Connect your Calendly account and click "Continue". Click "Test & Review. Review your test appointment details. Click "Continue".
- Note: You must have a Premium or Pro plan with Calendly in order to connect to Zapier.
4Select "WhatConverts" as the Action App and "Create Lead" as the Action Event. Connect your WhatConverts account.
- Note: To connect your WhatConverts account, click on the following for instructions on how to connect WhatConverts with Zapier.
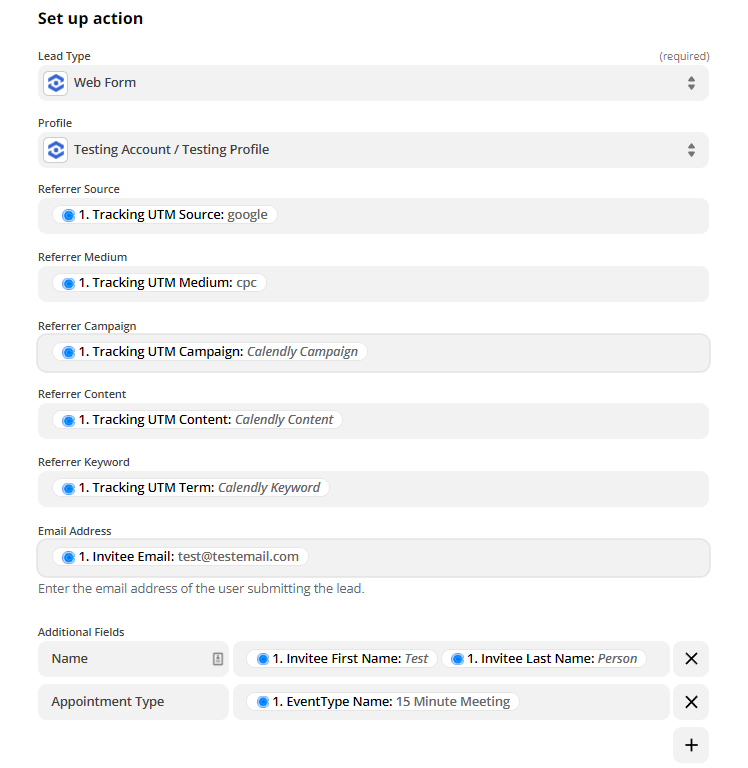
On the Set up your WhatConverts Lead with the following:
- Lead Type: "Web Form"
Profile: Select your WhatConverts Profile
Referrer Source: "Tracking UTM Source"
Referrer Medium: "Tracking UTM Medium"
Referrer Campaign: "Tracking UTM Campaign"
Referrer Content: "Tracking UTM Content"
Referrer Keyword: "Tracking UTM Term"
Additional Fields: Add any additional fields that you will want to track
Click "Continue". Review your information and click "Test & Continue".Turn your Zap "On".
- Note: Calendly only accepts Source, Medium, Campaign, Content and Keyword dynamic information from WhatConverts. GCLID and MSClkdID values cannot be passed. This means conversions from Calendly cannot be sent back to Google Ads or Bing Ads.
5Log into the WhatConverts profile you sent the test appointment to. Click "Leads" in the top menu. Under Lead Manager, locate and review the Calendly appointment form.
If you have any questions, please contact us here: Contact WhatConverts Support or email support@whatconverts.com
Get a FREE presentation of WhatConverts
One of our marketing experts will give you a full presentation of how WhatConverts can help you grow your business.
Schedule a Demo


