OnePageCRM Integration
Send Phone Calls to OnePageCRM
1Go to OnePageCRM. Click "Settings" then "Custom Fields". Under Contact Fields, click "+ Add". Name your field "Lead ID" and select "Single line text" as the Field Type. Click "Save".
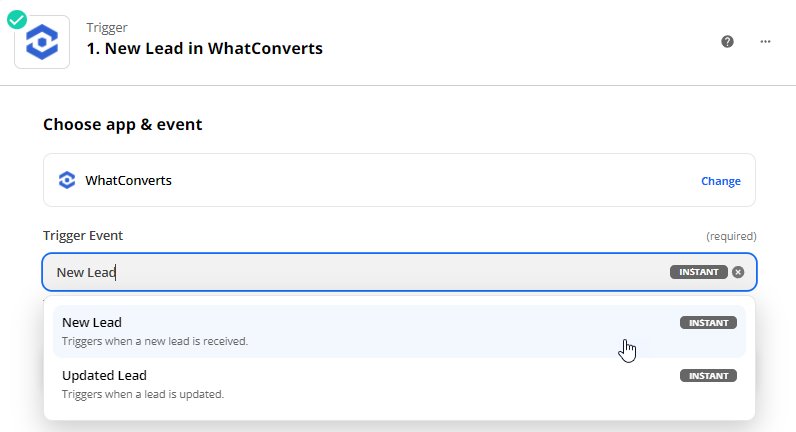
2Log into Zapier and click "Make a Zap". Select "WhatConverts" as your Trigger App and "New Lead" as the Trigger.
Connect your WhatConverts account and click "Continue".
Note: To connect your WhatConverts account, click on the following for instructions on how to connect WhatConverts with Zapier.
On the Set Up Trigger page, select "Yes" for only one of the phone call triggers and leave all other fields as "no". In the final drop-down menu, select your profile. Click "Continue".
Important: For Phone calls and/or Chats, make sure to select "Yes" for only one of the phone call options to eliminate duplicates from being sent into your CRM.
- Phone Call (Completed): Sends the lead to the CRM once the Phone Call has finished
- Phone Call (Modified): Sends the lead to the CRM when a phone call is in progress and the lead in WhatConverts is modified.
- Phone Call (In Progress): Sends the lead to the CRM when a phone call has begun. This is the option to use if you would like your agents to update the CRM while they are on the phone with the caller.
Select "Test trigger". Select a lead from the drop-down and click "Continue".
Note: If no lead is found, submit a test phone call and re-test this step of your Zap.
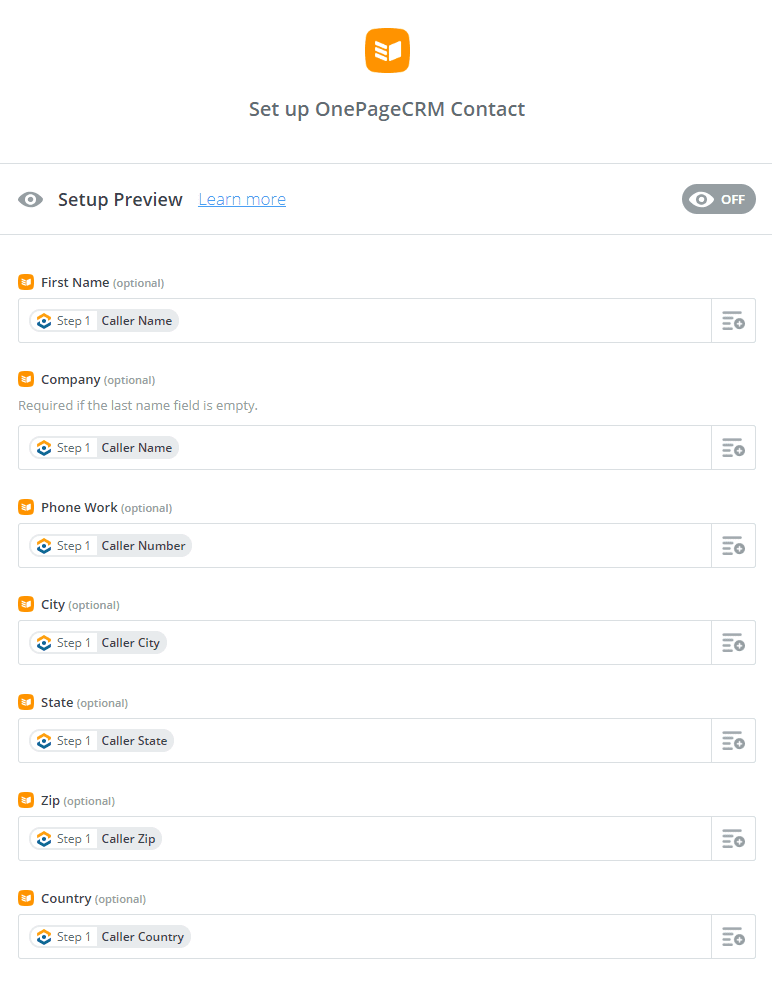
3Add an action step with "OnePageCRM" as your action app. Select "Create Contact" as your action. Click "Continue". Connect your OnePageCRM account and click "Continue". Select the following on the Set Up Action page:
- First Name or Last Name: "Caller Name"
- Company: "Caller Name"
- Phone Work: "Caller Number"
- City: "Caller City"
- State: "Caller State"
- Zip: "Caller Zip"
- Country: "Caller Country"
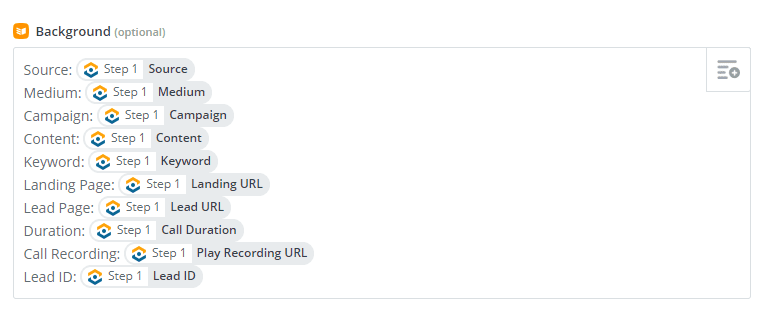
Background: Type in the following then choose the counterpart from the drop down.
- Source: "Source"
- Medium: "Medium"
- Campaign: "Campaign"
- Content: "Content"
- Keyword: "Keyword"
- Landing Page: "Landing URL"
- Lead Page: "Lead URL"
- Duration: "Call Duration"
- Call Recording: "Play Recording URL"
- Lead ID: "Lead ID"
Click "Continue". Send a test to OnePageCRM, click "Finish", give your Zap a name and turn your Zap on.
Send Forms and Chats to OnePageCRM
1Go to OnePageCRM. Click "Settings" then "Custom Fields". Under Contact Fields, click "+ Add". Name your field "Lead ID" and select "Single line text" as the Field Type. Click "Save".
2Go to Zapier and make a Zap. Select "WhatConverts" as your Trigger App and "New Lead" as your Trigger. Connect your WhatConverts account and click "Continue".
On the Set up trigger page, select "Yes" for Web Forms and Chats leave all other fields as "no". Select "Test trigger". Select a Web Form lead from the drop-down and click "Continue".
Note: If no web form lead is found, submit a test form and re-test this step of your Zap.
3Add an Action Step with "OnePageCRM" as your Action App. Select "Create Contact" as your Action. Click "Continue".
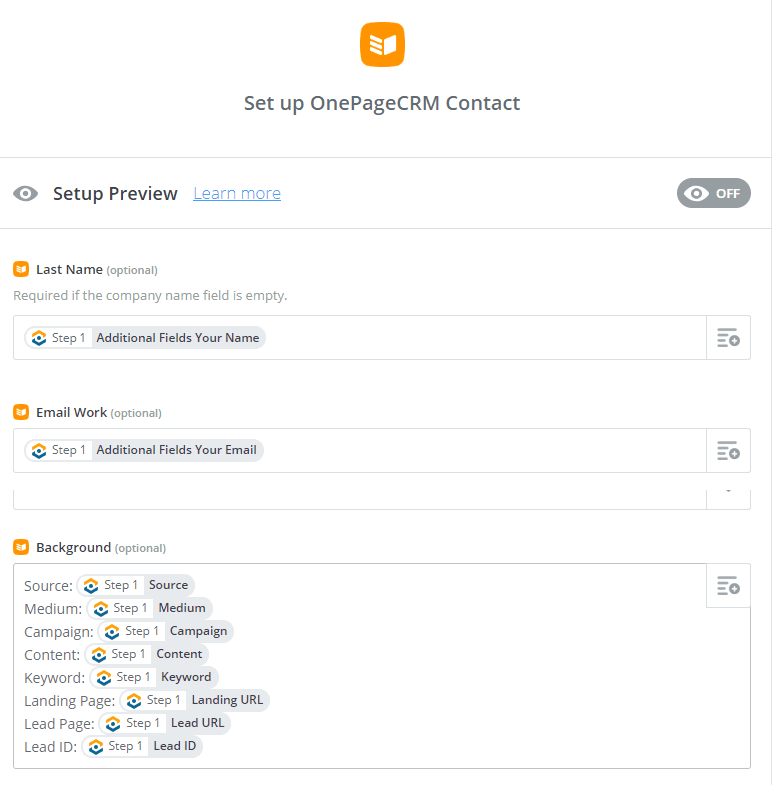
Connect your OnePageCRM account and click "Continue". Match as many of the fields on the Set up OnePageCRM Contact page as shown below to your test form (Note: A Last Name or Company Name is required).
- First Name or Last Name: "Additional Fields Name"
- Company: "Additional Fields Company Name"
- Phone Work: "Additional Fields Phone Number"
- Background: Type in the following then choose the counterpart from the drop down:
- Source: "Source"
- Medium: "Medium"
- Campaign: "Campaign"
- Content: "Content"
- Keyword: "Keyword"
- Landing Page: "Landing URL"
- Lead Page: "Lead URL"
- Lead ID:"Lead ID"

Click "Continue". Send a test to OnePageCRM, click "Finish", give your Zap a name and turn your Zap on.
If you have any questions, please contact WhatConverts Support or email support@whatconverts.com.
Get a FREE presentation of WhatConverts
One of our marketing experts will give you a full presentation of how WhatConverts can help you grow your business.
Schedule a Demo


