

Track E-goi Web Forms
E-goi is an email marketing and automation platform that allows you to create and embed forms on your website. Because E-goi forms are embedded via iFrames, WhatConverts requires a multi-step setup process to properly track form submissions with complete attribution data. You'll need access to both your E-goi account and your website's code.
Note: The WhatConverts tracking script must be installed on your website and E-goi before you can track forms.
Set Up E-goi Form Tracking
E-goi form tracking requires four main steps: configuring the E-goi widget, finding your form identifiers, adding code to your website, and setting up manual tracking in WhatConverts.
Step 1: Add Tracking Code to E-goi Form Widget
- Log in to your E-goi dashboard.
- Navigate to the forms section.
- Find the form you want to track in WhatConverts.
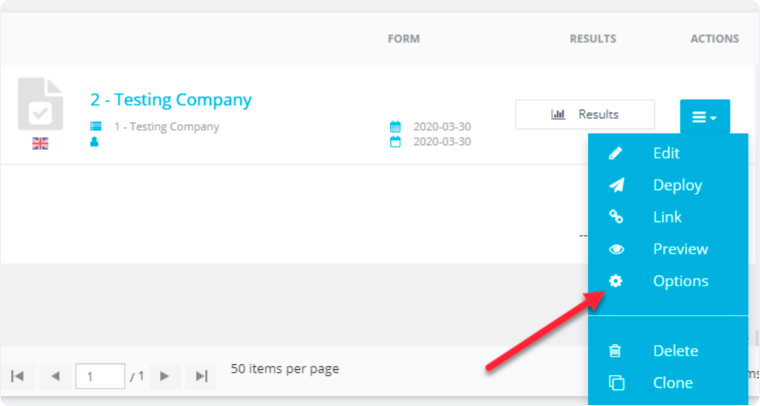
- Click the blue hamburger menu next to your form.
- Select "Options".
- In the form editor, click the "Widgets" tab.
- Add a "Custom HTML" widget.
- Paste the following code into the Custom HTML widget:javascript
<script type="text/javascript">
wc_frame_parent = 'https://www.yourURLhere.com/';
</script>
<script src="//scripts.iconnode.com/#####.js"></script>
- Replace https://www.yourURLhere.com/ with the URL of the page where your E-goi form is located.
- Replace ##### with your WhatConverts Profile ID.
- Click "Save" to save the E-goi form settings.
Tip: The wc_frame_parent script tells WhatConverts which parent page contains the E-goi form, enabling proper cross-domain tracking between the iFrame and your website.
Step 2: Find Your Form's iFrame ID and Class
- Go to the page on your website where the E-goi form is located.
- Right-click on the form and select "Inspect" to open browser developer tools.
- In the HTML inspector, find the <iframe> tag that contains your E-goi form.
- Copy the id attribute value from the iframe tag and paste it into a text document. This is your iFrame ID.
- Below the <iframe> tag, locate the <form> tag.
- Copy the class attribute value from the form tag and paste it into a text document. This is your Form Class.
Step 3: Add iFrame Target Code to Your Website
- On your website, navigate to the page where the E-goi form is embedded.
- Add the following code to the footer of that page (before the closing </body> tag):
<script type="text/javascript"> wc_frame_target = "[id='Copied Iframe ID from Above']"; </script> - Replace Copied Iframe ID from Above with the iFrame ID you copied in Step 2.
- Save your website changes
Step 4: Configure Manual Tracking in WhatConverts
- Log in to your WhatConverts profile where you want to track this form.
- Go to "Tracking" from the top menu.
- Select "Forms" then click "Web Forms".
- Click "Add Web Form".
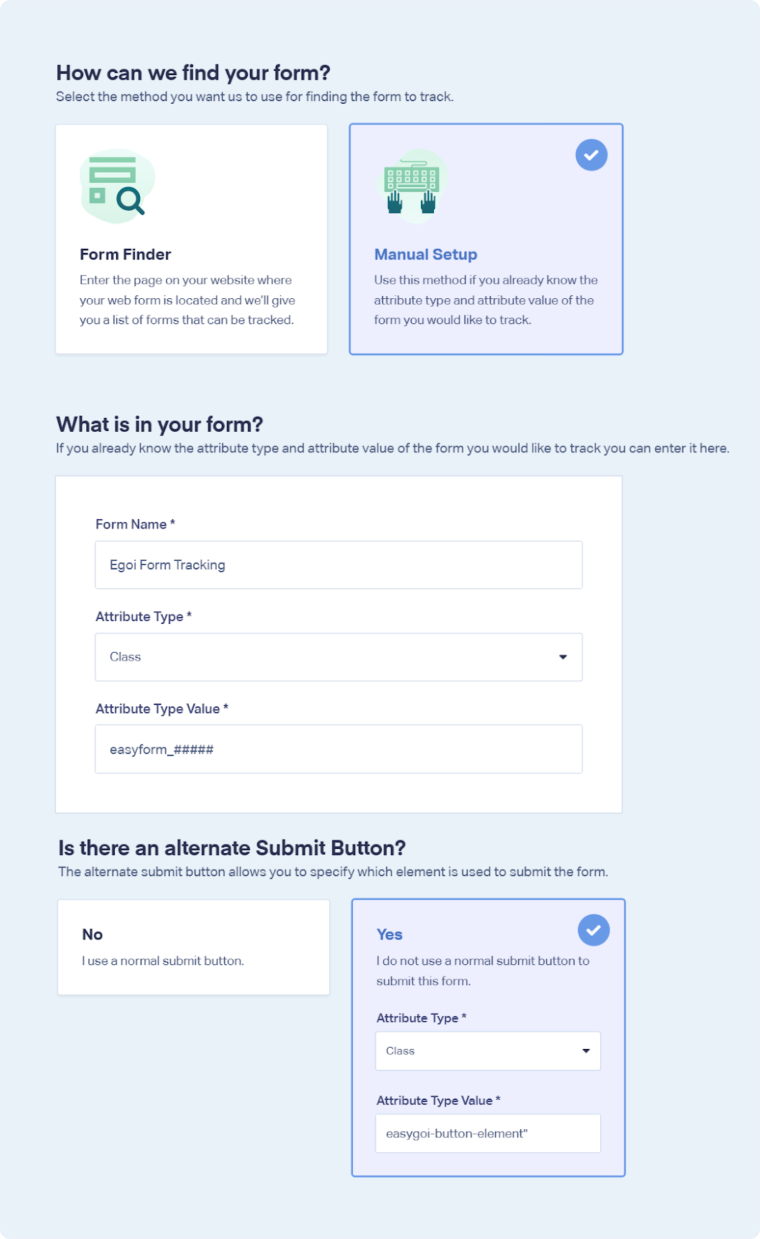
- Select "Manual Setup".
- In the "Form Name" field, enter a descriptive name (e.g., E-goi From Tracking).
- For "Attribute Type", select "Class" from the dropdown.
- For "Attribute Type Value", paste the Form Class you copied in Step 2.
- Scroll down to "Is there an alternate Submit Button?" and select "Yes".
- For the alternate submit button "Attribute Type", select "Class".
- For the alternate submit button "Attribute Type Value", enter easygoi-button-element.
- Click "Finish".
Your E-goi form is now configured for tracking. WhatConverts will capture all submissions from this form with full attribution data.
Test Your E-goi Form Tracking
After setting up tracking, verify that form submissions are being captured correctly:
- Go to the page on your website where your E-goi form is located.
- Fill out the form with test information and submit it.
- Return to your WhatConverts profile and view your form leads.
- Find the test form submission and check its data.
If your test lead appears correctly, your E-goi form tracking is working properly.
Related Topics
- What is Web Form Tracking?
- Track Web Forms in iFrames
- Track Web Forms Manually
- Track HubSpot Web Forms
- Track Zoho Web Forms
Get a FREE presentation of WhatConverts
One of our marketing experts will give you a full presentation of how WhatConverts can help you grow your business.
Schedule a Demo


