


Use Field Mappings
Once you’ve created a Field Mapping, you can quickly add new fields to it directly from the page. This helps you group multiple fields (e.g. “area_0001”, “area_xyz_02”) under the same column in the Lead Manager.
Map a Field from the Lead Details Page
The easiest way to map a field to an existing Field Mapping:
- Access the Lead Details of any lead with the field you want to map (e.g., “area_xyz_02”).
- Click “Map Field”, next to the field name.
- Click “Select an Option”.
- Choose the Field Mapping name you’ve already created (e.g. “Service Area”).
- Click “Save”.
- The field is now added to the Field Mapping and shows a “Mapped” label in the Lead Details page.
- Go to the Profile Settings and click “Field Mapping” to confirm the field has been added to the Field Mapping.
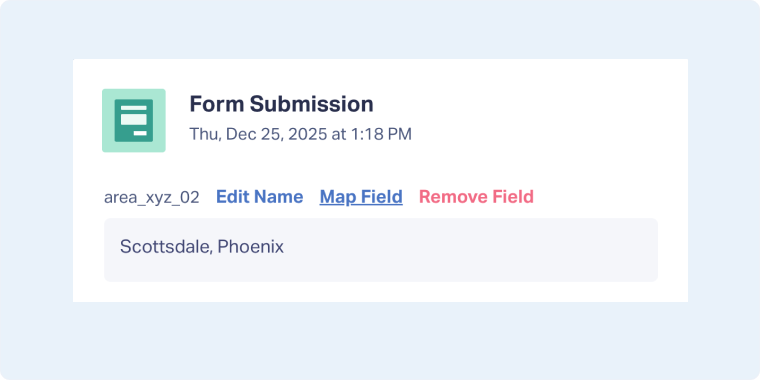
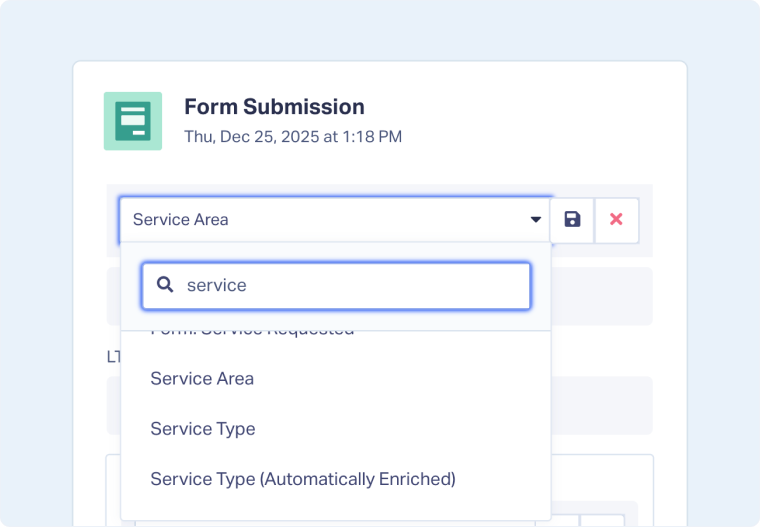
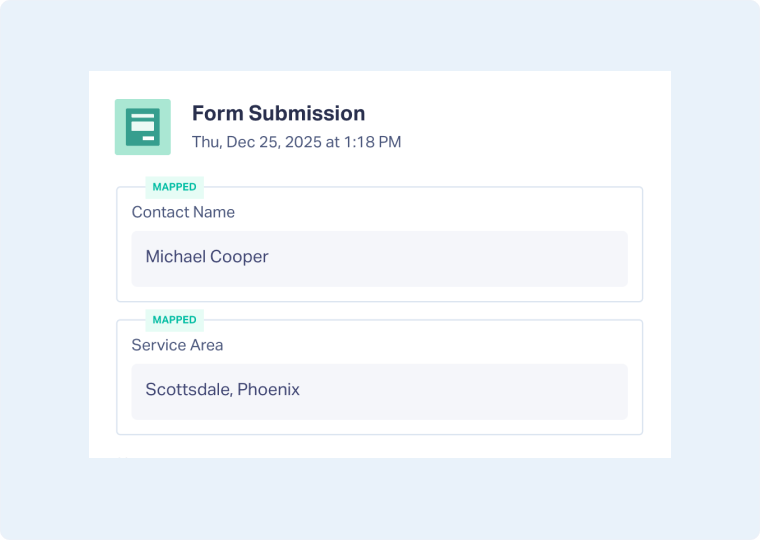
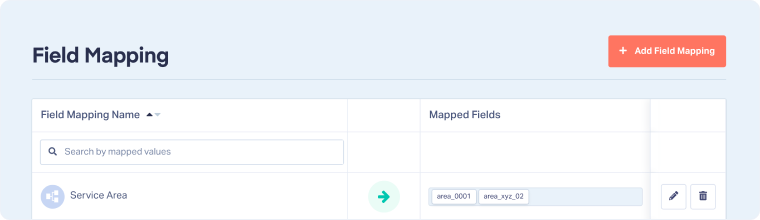
In this example, all data captured under the original form fields “area_0001” and “area_xyz_02” will appear in the Lead Manager and Lead Details page under a standardized field called “Service Area”.
Note: You can add more fields to an existing Field Mapping by repeating the same process or by editing it and adding another Field Mapping Group.
Related Topics
Was this page helpful?
Get a FREE presentation of WhatConverts
One of our marketing experts will give you a full presentation of how WhatConverts can help you grow your business.
Schedule a Demo