

Sending Web Forms to Pipedrive
To set up Pipedrive to receive web forms from WhatConverts, you'll need to add custom Lead ID fields for the Person and Lead/Deal categories.
Important Note: Skip Step One if you've already completed the steps in the Sending Phone Calls to Pipedrive article.
1Go to your Pipedrive account. Go to "Company Settings" by clicking your User Icon in the top right corner. Under the Company section, select "Data Fields". Click the "Add Custom Field" button. Select "Person Field".
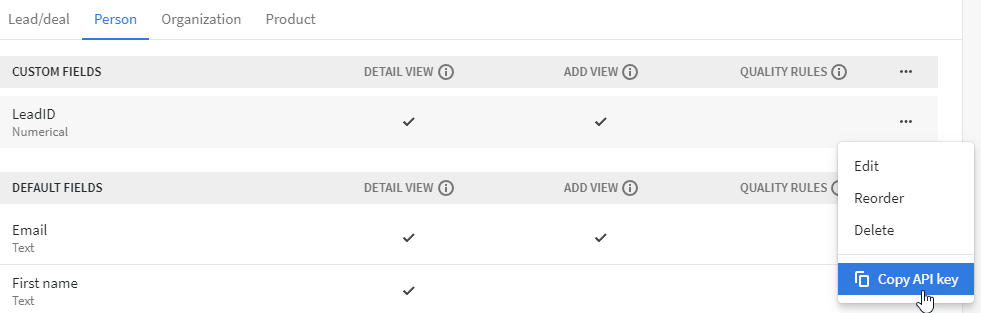
Choose "Numerical" as your field type. Enter the Field Name: "LeadID". Check all of the Field Properties boxes. Click "Save".
Note: Copy the "API key" by selecting the three dots at the end of the row.
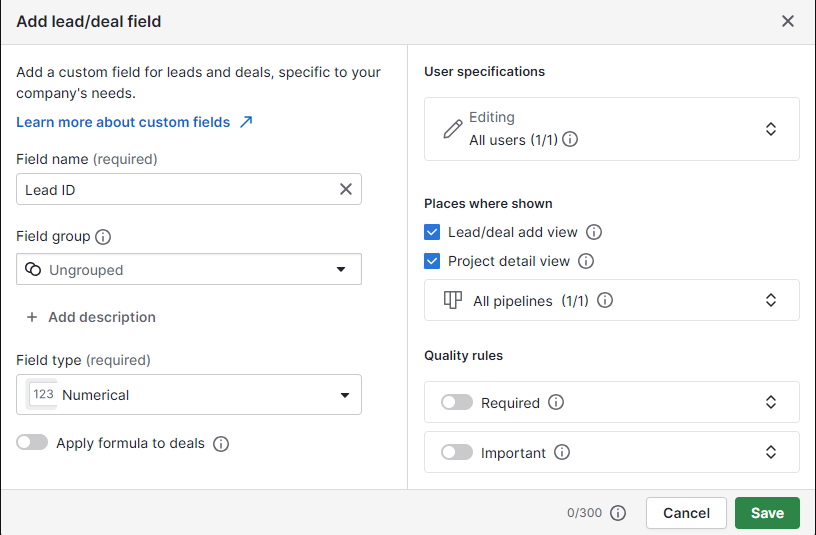
Click the "Add Custom Field" button. Select "Lead/Deal Field".
Choose "Numerical" as your field type. Enter the Field Name: "LeadID". Check all of the Field Properties boxes. Click "Save".
2Log into Zapier and click "Create Zap". Select "WhatConverts" as your Trigger App and "New Lead" as the Trigger event.
We highly recommend setting up Field Mapping prior to completing this step.
Connect your WhatConverts account and click "Continue".
On the Set up trigger page, select "Yes" only for "Web Forms". Select your profile from the drop down and click "Continue". Select "Test trigger". Select a lead from the drop-down and click "Continue".
Note: If no lead is found, submit a test form and re-test this step of your Zap.
3Select "Pipedrive" as your Action App and "Create Person" as your Action event. Click "Continue”. Connect or Select your Pipedrive Account. Click "Continue".
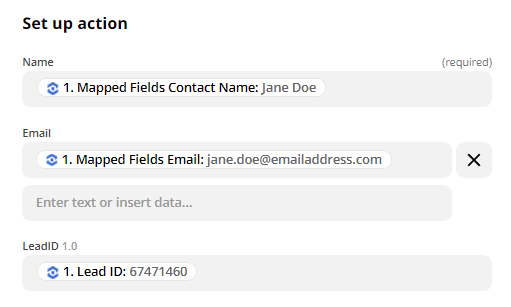
Set your fields to the following on the Set up action page.
- Name: Mapped Fields Contact Name
- Email: Mapped Fields Email
- Lead ID: Lead ID
You can also set up the Phone Number and any additional fields you would like to pass if you have those available.
Once all the fields are set click "Continue". Review your data and click the "Test & Continue" button. Turn your Zap "On".
4Go to Pipedrive and select "Contacts"; Under People you will see the contact lead form information from WhatConverts.
If you have any questions, please contact WhatConverts Support or email support@whatconverts.com
Get a FREE presentation of WhatConverts
One of our marketing experts will give you a full presentation of how WhatConverts can help you grow your business.
Schedule a Demo


