


Prepare Your Lead Import CSV File
Whether you’re importing new leads or updating existing ones, you'll first need to prepare a CSV file with all the data you want to import into WhatConverts.
Tip: If you’re new to importing, start with Use the Lead Import Tool to see the end-to-end process, then come back here to build your file.
Note: The limit is 500 leads per CSV file. If you need to import/update more than 500 leads, split them into multiple files.
Step 1: Download the Template
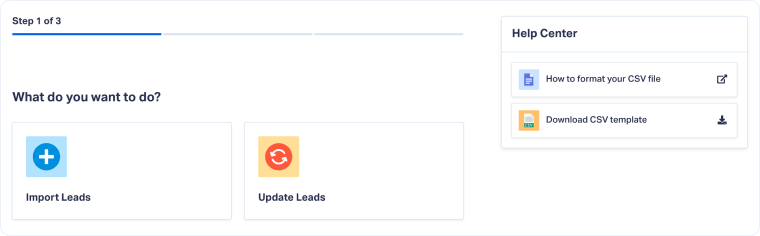
You can download the pre-formatted CSV template directly from the Help Center sidebar in the Lead Import / Update tool.
The template includes all available column headers already named for WhatConverts fields.
- Go to the Profile Settings and click “Lead Import / Update”.
- Click “Download CSV Template”.
- Open the file.
- Delete any columns you don’t need; keep only the ones you’ll populate.
Note: If you cannot see the Help Center sidebar, try zooming out or widening your browser window.
Step 2: Know the Required Fields
Depending on your goal, importing new leads or updating existing ones, the CSV must contain specific fields.
For Importing New Leads
| Required Field | What it is | Format / Example |
| Lead Type | Type of conversion. Accepts: Phone Call, Web Form, Chat, Appointment, Email, Text Message, Transaction, Custom Event, or Other. | Text(e.g., Phone Call, Web Form, Chat, Appointment) |
| Date Created | When the lead happened. Used to order events in a customer journey. | YYYY-MM-DD HH:MM (e.g., 2025-04-29 17:10:00) |
| Time Zone | Timezone for Date Created. | GMT±HH:MM (e.g., GMT-05:00). |
Note: Do not include a Lead ID when importing new leads. WhatConverts assigns one automatically.
Note: To build a Customer Journey, include an identifier column (such as Email Address or Phone Number) shared across multiple leads to link them. The Date Created field determines the order of those leads.
For Updating Existing Leads
When updating existing leads, include at least one identifier column so the system can match records correctly.
| Required Field | What it is | Format |
| Lead ID | Unique identifier created automatically by WhatConverts when a lead is captured. Recommended for accuracy. | Text (e.g., 196520015) |
| Email Address | The email the lead used during conversion. Automatically mapped when detected. | name@domain.com (e.g., user@wcexample.com) |
| Phone Number | The phone number used for the conversion. Must include country code and follow E.164 format. | +14123456760 (US) / +447911123456 (UK) |
Tip: Export the leads you plan to update and use that export to capture the Lead ID column for precise matching.
Note: It is recommended to use the Lead ID, but you can use the Email Address for Forms and Chats, and the Phone Number for Phone Calls (according to your setup and needs).
If you decide to use the Email Address or Phone Number as the lead identifier, and there’s more than one record sharing that same identifier (e.g., a repeat lead with multiple conversions in the same customer journey), you’ll need to manually select which lead record to update.
Step 3: Fill and Map the Rest Of Your Data
Use these guidelines for popular fields:
| Field | What it is |
| Contact Name / Company Name | You can map these as Additional Fields first, then tie them into the Contact Details card via Field Mappings. |
| Quotable | Accepts: yes, no, pending, not_set. |
| Sales Value / Quote Value | Numbers only, no currency symbol. Use decimals if needed (e.g., 2499.19). |
| Source | Where the lead originated (e.g., google, facebook, bing, direct, etc.) |
| Medium | Marketing medium (e.g., cpc, lsa, organic, email, referral) |
| Lead Page | The page where the conversion occurred. Format: https://www.website.com/ |
| Landing Page | The first page visited in the session. Format: https://www.website.com/ |
| Additional Fields | Data that adds context and usually comes from a CRM (e.g., Customer ID, Account Owner, LTV). These appear in the Conversion Details section. In mapping, choose Additional Field. |
| Custom Fields | Business-specific attributes used to categorize/qualify leads (e.g., Service Type, Sales Rep, Region, Lead Qualification). In mapping, choose Custom Field. |
Note: Review column headers before importing. They don’t have to match WhatConverts exactly, but the closer they are, the easier field mapping will be.
Note: If a column in your data doesn’t match any WhatConverts native field, map it to a Custom Field (for categorization/qualification) or Additional Field (for CRM/external context).
Step 4: Run the Formatting Checklist
Before uploading, double-check the following:
- Save your file as .csv (not .xlsx).
- Use UTF-8 encoding to avoid broken special characters.
- Keep only the columns you’ll populate.
- Make headers clear and consistent (match the template where possible).
- No currency symbols; numbers only for values.
- No extra spaces before/after values (especially in emails, phone numbers, and URLs).
- Use E.164 format for phone numbers (include country code).
- Ensure every row has valid Lead Type, Date Created, and Timezone when importing new leads.
- Use consistent casing (e.g., all lower-case emails).
- If exporting from a CRM, review/rename headers to align with WhatConverts fields before import.
Related Topics
Get a FREE presentation of WhatConverts
One of our marketing experts will give you a full presentation of how WhatConverts can help you grow your business.
Schedule a Demo


