


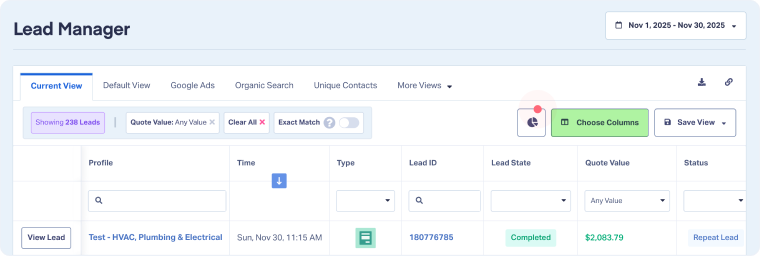
Choose Lead Manager Columns
Choosing columns in the Lead Manager lets you decide which lead details are displayed in your table view. This makes it easier to focus on the data that matters most to your business.
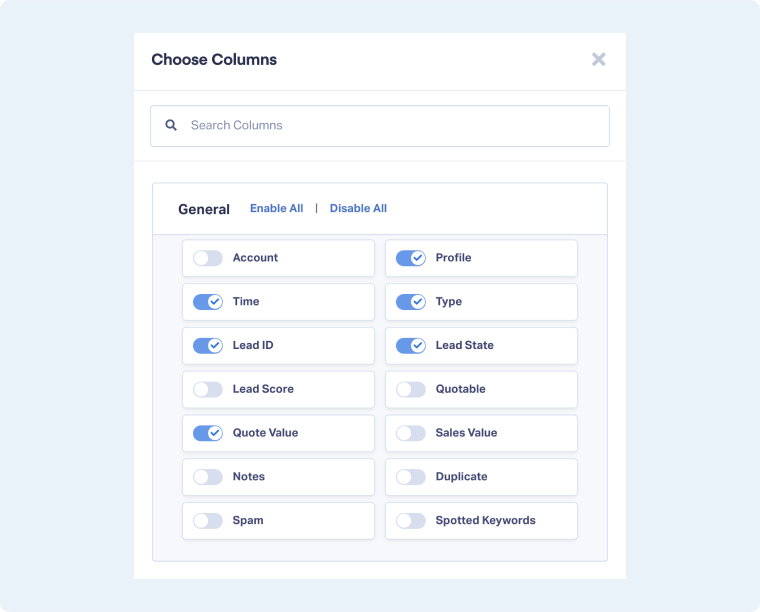
The Lead Manager includes more than 70 standard columns. In addition, you can display Custom Fields, Mapped Fields, Dimension Groupings, and Lead Analysis fields.
Add Columns to the Lead Manager
To choose which columns to display:
- Open the Lead Manager.
- Click “Choose Columns”.
- Use the search bar to quickly find a column, or scroll through the grouped sections.
- Toggle columns on or off to add or remove them from your table.
- To enable or disable all columns in a group, click “Enable All” or “Disable All” next to the group name.
Tip: Once you’ve chosen your columns, you can save your selection as a custom view. See Create a Lead Manager View. When you edit the columns in a view, you’ll see a prompt to either “Update View” or “Save as New” so you can decide whether to overwrite the current view or create a new one.
Related Topics
Get a FREE presentation of WhatConverts
One of our marketing experts will give you a full presentation of how WhatConverts can help you grow your business.
Schedule a Demo


