Create an Individual Intelligence Rule From Scratch
In this guide, you’ll learn how to create Lead Intelligence rules, which help you automate lead qualification and management tasks using customized logic.
By using an IF/THEN structure, these rules let you assign values, categorize leads, or trigger updates based on specific lead data, saving time and ensuring consistency.
Note: Lead Intelligence is available for Elite plans and higher. If you don’t see this feature, consider upgrading your plan.
Step 1: Access Lead Intelligence
1Go to the Control Center.
2Select the Master Account or one of your Profiles.
3Click Lead Intelligence.
Note: You can apply rules to your Master Account or Profiles, so make sure you’re at the proper level.
Step 2: Create a New Rule
1Click + Add Intelligence Rule.
2Click Add Individual Rule.

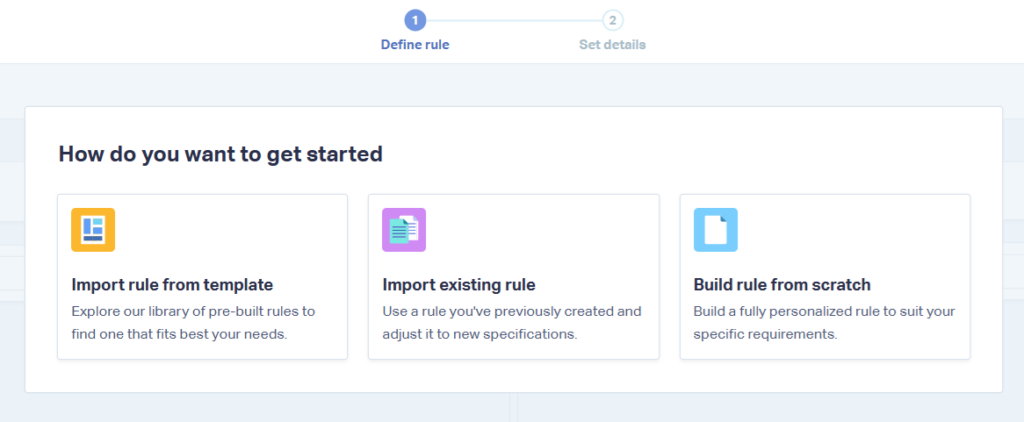
3There are three options you can choose from to get started:
- Import rule from template - Choose from our list of pre-made Rule Templates.
- Import existing rule - Import a rule from another profile.
- Build rule from scratch - Choose the conditions and actions that occur once those conditions are met.
Note: If you’re new to lead intelligence, we recommend looking for a suitable Rule Template before building a rule from scratch.
Step 3: Define Rule Conditions (IF)
Conditions are the if part of your rule. They define which leads will trigger the rule.
Each condition includes:
- Dimension - The lead data point to check
- Qualifier - The comparison operator
- Value - The value you want to compare against
Example:
- Dimension: Quotable
- Qualifier: is
- Value: Yes
To add multiple conditions:
- Click the + icon
- Choose whether to connect conditions with AND or OR
- This lets you trigger an action only when all of a set of conditions are met (AND between conditions), or any condition within a set is met (OR between conditions).
Step 4: Set Rule Actions (THEN)
Actions are the then part of your rule. They define what happens when the conditions are met.
Each action includes:
- Type of Action - What the rule will do
- Dimension - What lead data point will be updated
- Value - The value to apply
Example:
- Type of Action - Set value of
- Dimension - Quote Value
- Value - 100
To add more actions, click + Add Action.
Note: There are many different actions and action combinations to choose from. Multiple actions can only be grouped together by “AND.”
Step 5: Finalize the Rule
After defining conditions and actions:
1Click Continue.
2Fill in the rule details:
- Rule Name
- Rule Description
- Activate Rule?
- Which time zone should apply to this rule?
3Click Complete to save the rule and be taken back to the Lead Intelligence page.
Note: If you do not activate the rule, it will only run after clicking Apply Rules to Existing Leads on the Lead Intelligence page. When you apply rules to your existing leads, they will run in the order presented on this screen. You can reorder your rules by simply dragging and dropping them.
Step 6: Apply Rules to Existing Leads
To apply your rules to existing leads:
1From the Lead Intelligence page, click Manage Rules.
2Select Apply Rules to Existing Leads.
- A date range
- Select the rules you’d like to apply
- Confirm lead data modification
4Click Apply Rules to Selected Leads.
Note: Running rules for a large number of leads can take up to a few hours to complete.
Setting up AI Analysis through Lead Intelligence:
AI Analysis is a powerful tool that lets you automate lead evaluation, letting you ask AI models custom questions based on your lead data. AI analysis is set up through lead intelligence.
To set up AI Analysis:
1On the Lead Intelligence page, click "+ Add Intelligence Rule".
2Add the conditions you’d like to trigger AI Analysis. For example, if you want AI Analysis to look at all new phone calls, set your dimension to “Type” and value to “Phone Call”.

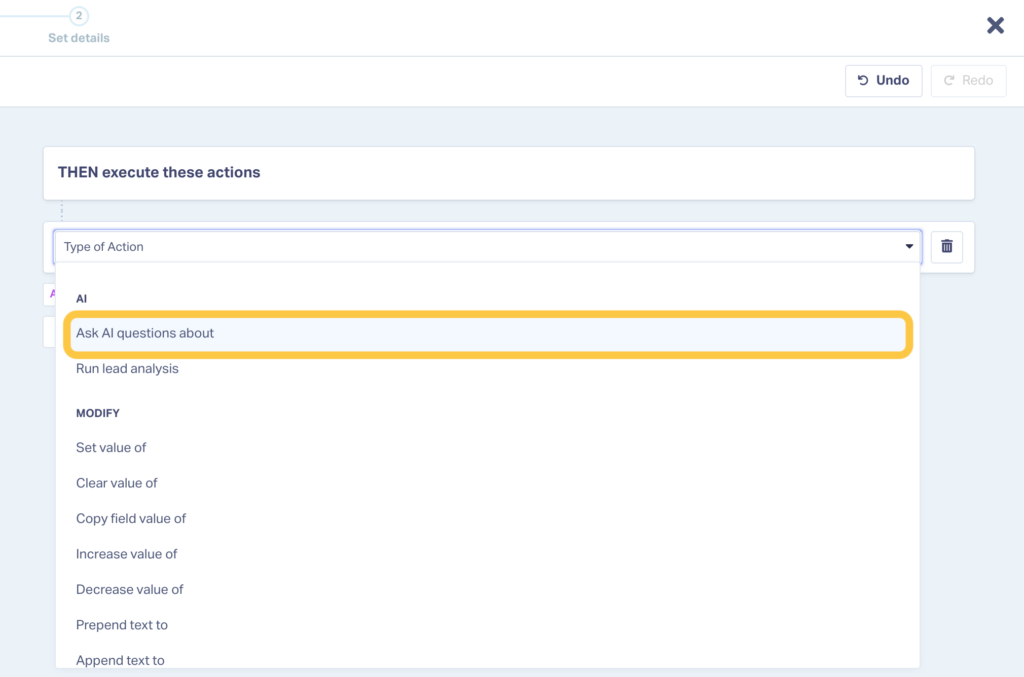
3Choose “Ask AI questions about” from the list of actions.

4Choose the dimensions you’d like AI Analysis to examine. For example, choosing “Call Transcription” will allow AI Analysis to answer questions based on the phone call conversation.
Note: You can include multiple dimensions.
5Enter the question you’d like AI Analysis to answer and how you would like the field to be labeled in the Lead Manager.

6Choose the format of the response that makes sense for your question.
7Be aware that pricing for AI Analysis is based on the amount of data sent and received back from the AI. As such, you may want to limit responses to the minimum number of words required to understand the insight. In our example, a yes or no answer makes more sense than a 15-word response.

8Confirm you approve the additional costs and click “Continue” to finish setting up just like any other Lead Intelligence rule.
Note: For more details on additional costs, please see the Rates page.
9Here are a couple examples of AI Analysis using different answer formats:
If you have any questions, please contact WhatConverts Support or email support@whatconverts.com
Get a FREE presentation of WhatConverts
One of our marketing experts will give you a full presentation of how WhatConverts can help you grow your business.
Schedule a Demo


