

Mapping Fields
WhatConverts captures information from form submissions on a website. With Field Mapping, you can sort, name, combine, and organize all of your form fields from the convenience of your WhatConverts dashboard.
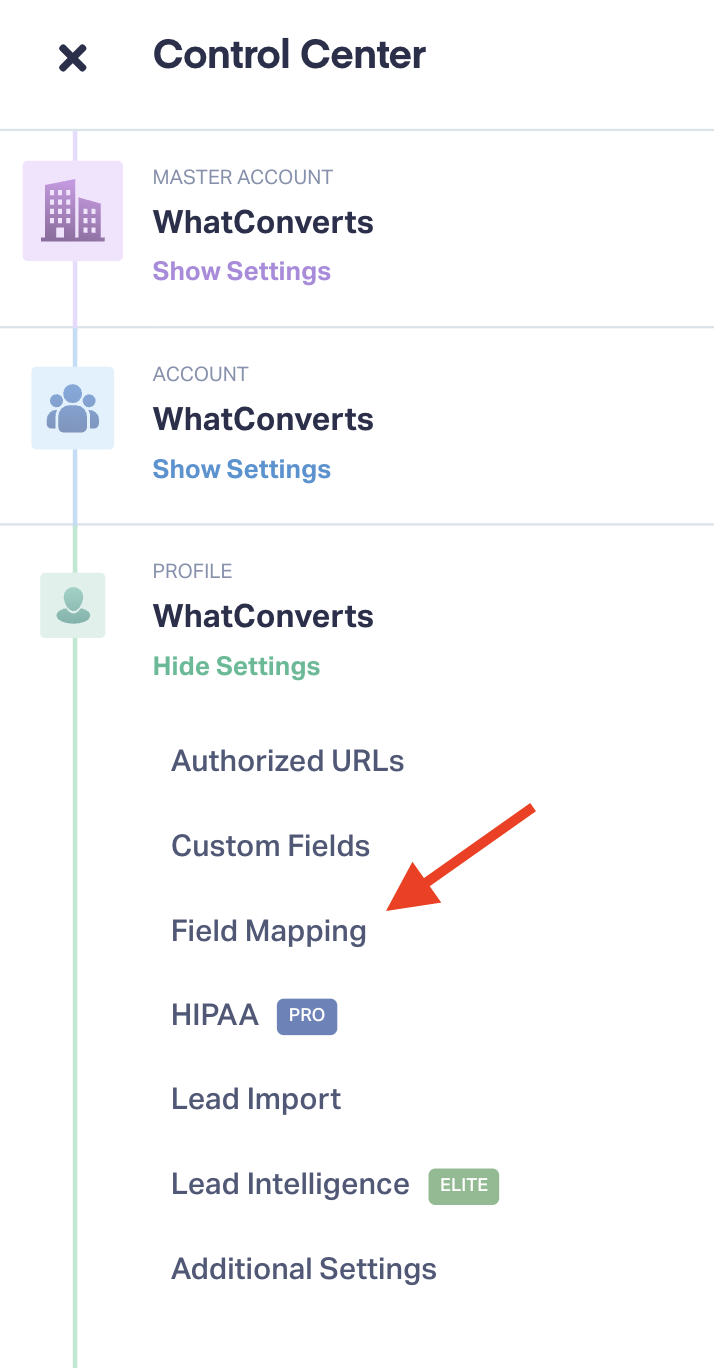
1Log into the WhatConverts profile you would like to use to set up Field Mapping. Navigate to the Profile menu on the left-hand menu. Select “Field Mapping.”
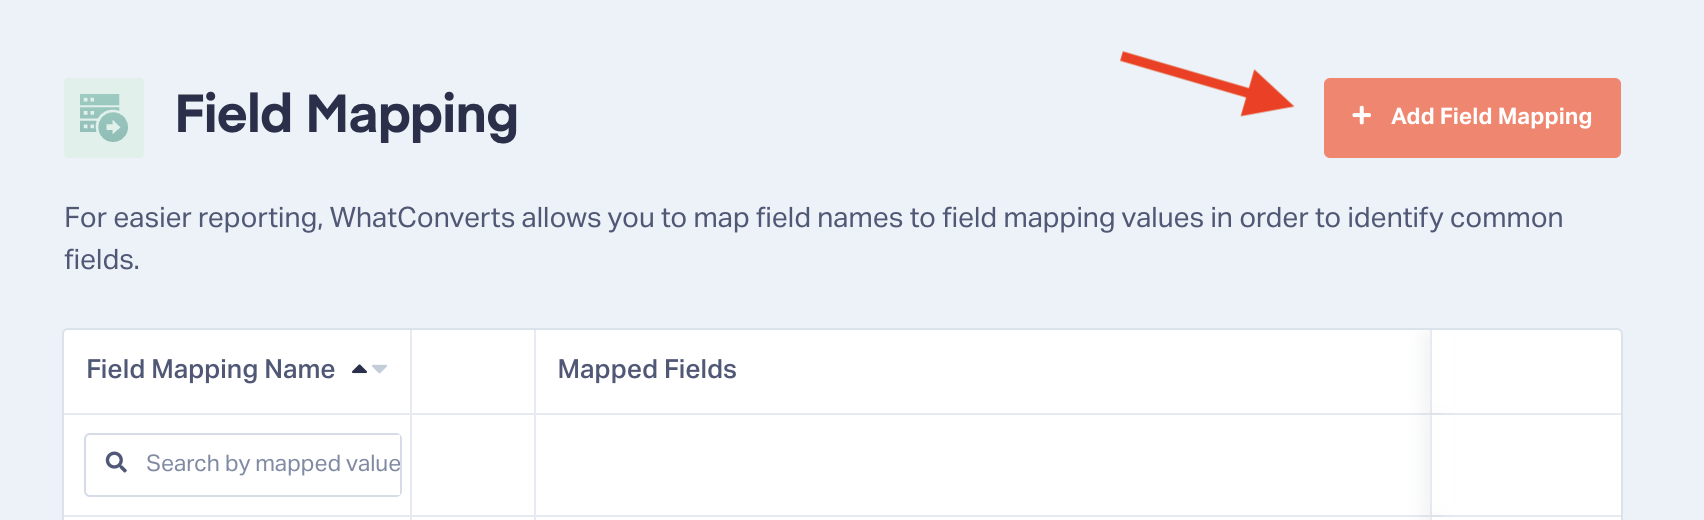
2Click "Add Field Mapping".
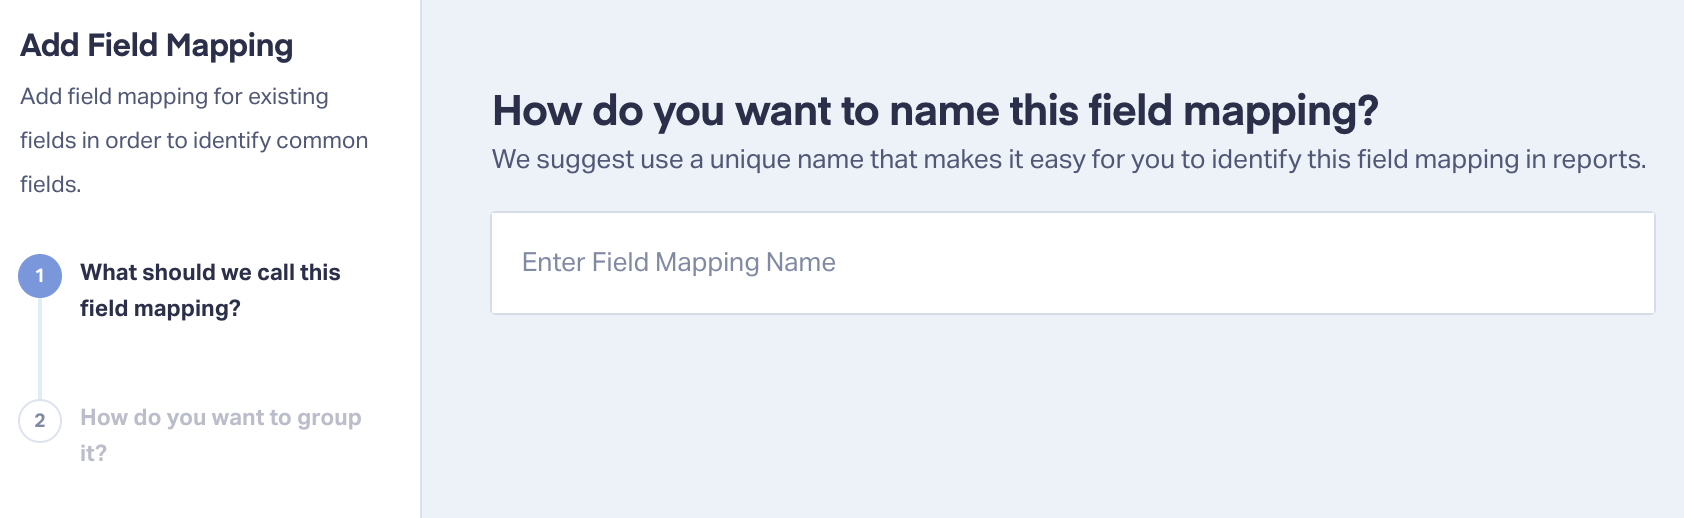
3Enter the field name as you would like it to appear within the leads manager and in your WhatConverts reports.
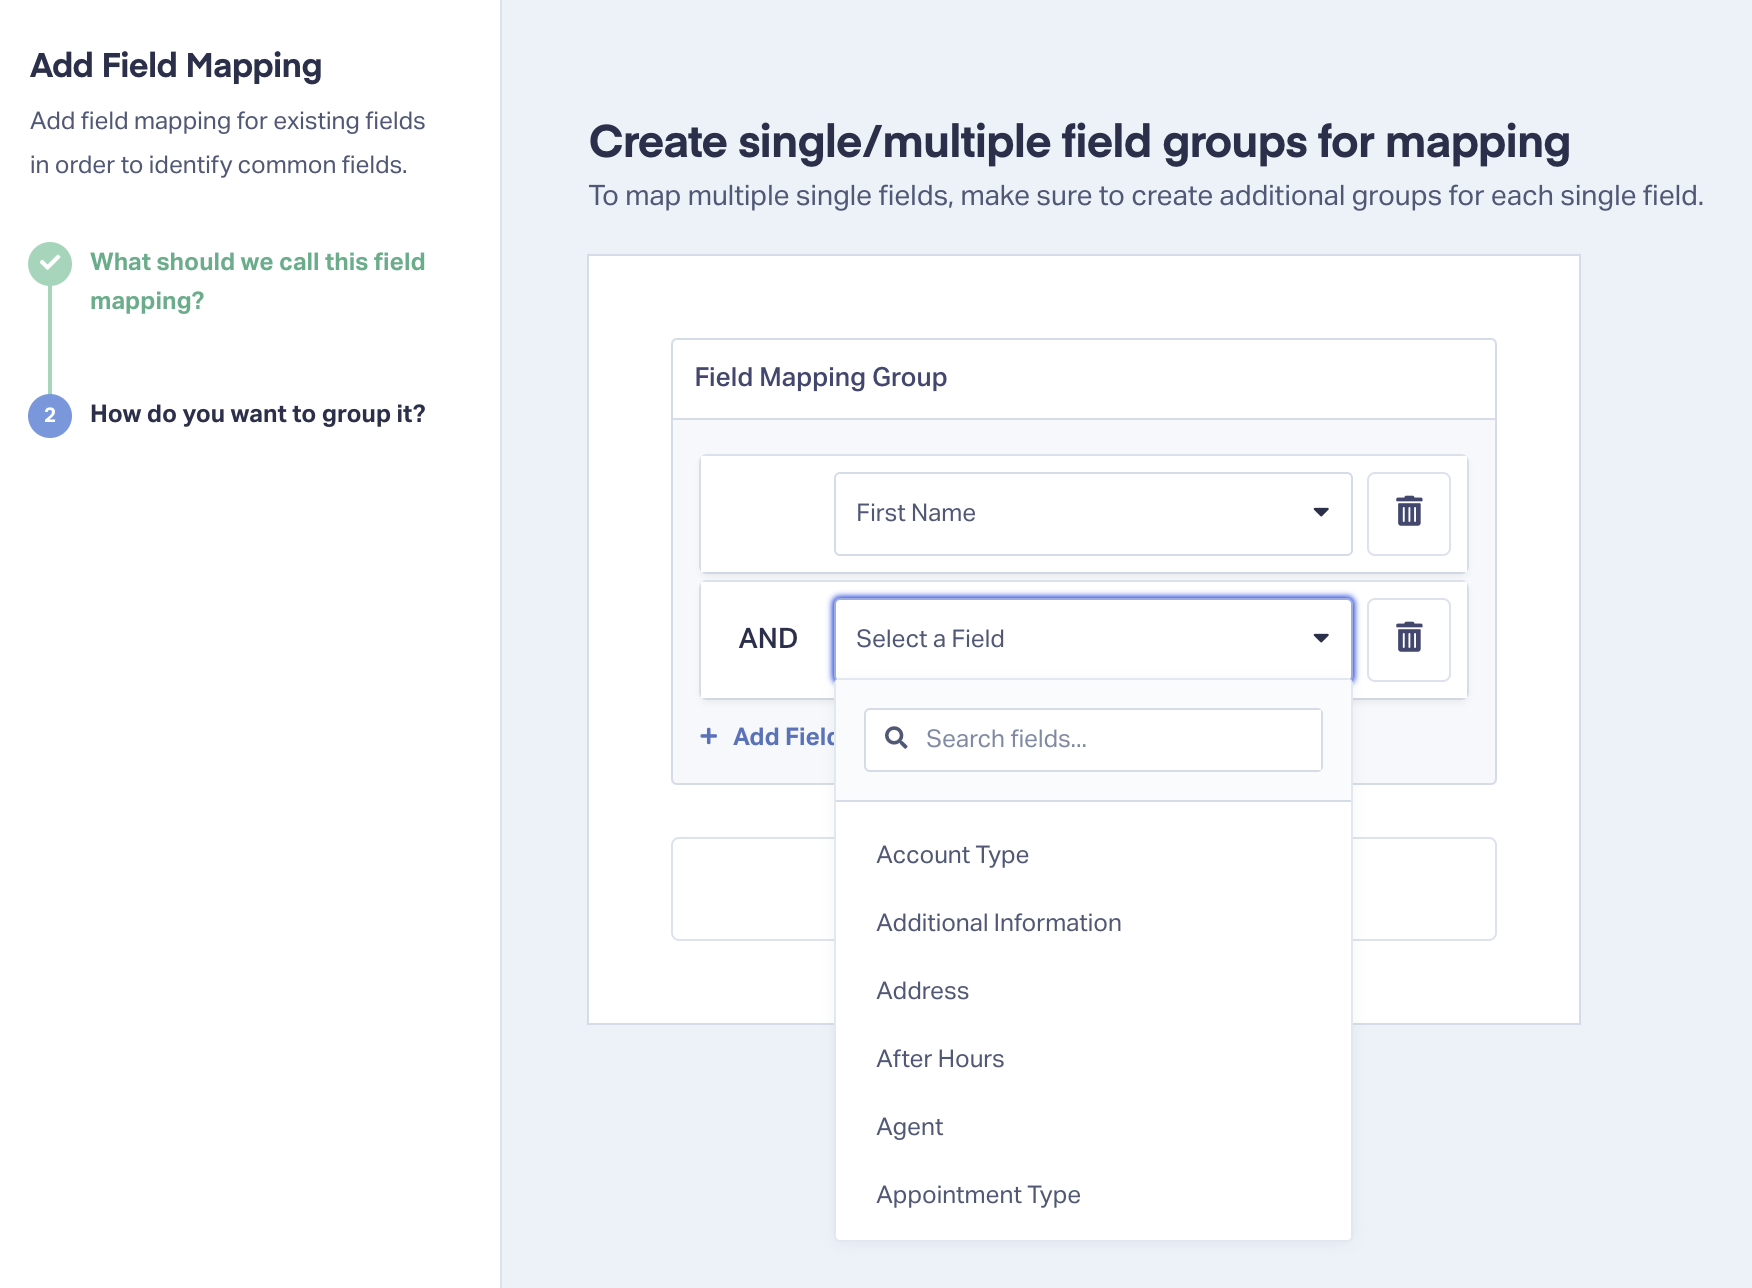
4Use the dropdown to select the field as it appears on your form. Click “Finish”.
Combine Form Fields into One Mapped Field
You can also use field mapping to combine separate form fields into a single column within WhatConverts. For example, if your form has two separate fields for “First Name” and “Last Name,” you can use field mapping to combine this information in a single column titled “Name.”
To combine fields using field mapping, first follow steps 1-3 above.
4Use the dropdown menu to select the first form field you’d like to combine (e.g. “First Name”).
5Click “+ Add Field to Group.” Use the second dropdown menu select the second form field you’d like to combine (e.g. “Last Name”). Click “Finish”.
Map Fields from Multiple Forms to One Mapped Field
If you have multiple forms on your site, you may find that you want form fields with different names to map to the same field within your lead manager. For example, you may have two forms that both collect the user’s name, but they file the information separately because Form A’s field is called “Name” and Form B’s field is called “Contact Name.” With field mapping, you can combine these fields into a single mapped field called “Lead Name.”
To map multiple form fields to a single mapped field, first follow steps 1-3 above.
4After selecting your first field using the dropdown menu, click “+ Add Field Mapping Group.” Select the second form field you would like to import to the same mapped field.

5Add a new field mapping group for each additional field you would like to import to the mapped field. When you’ve added all of your groups, click “Finish.”
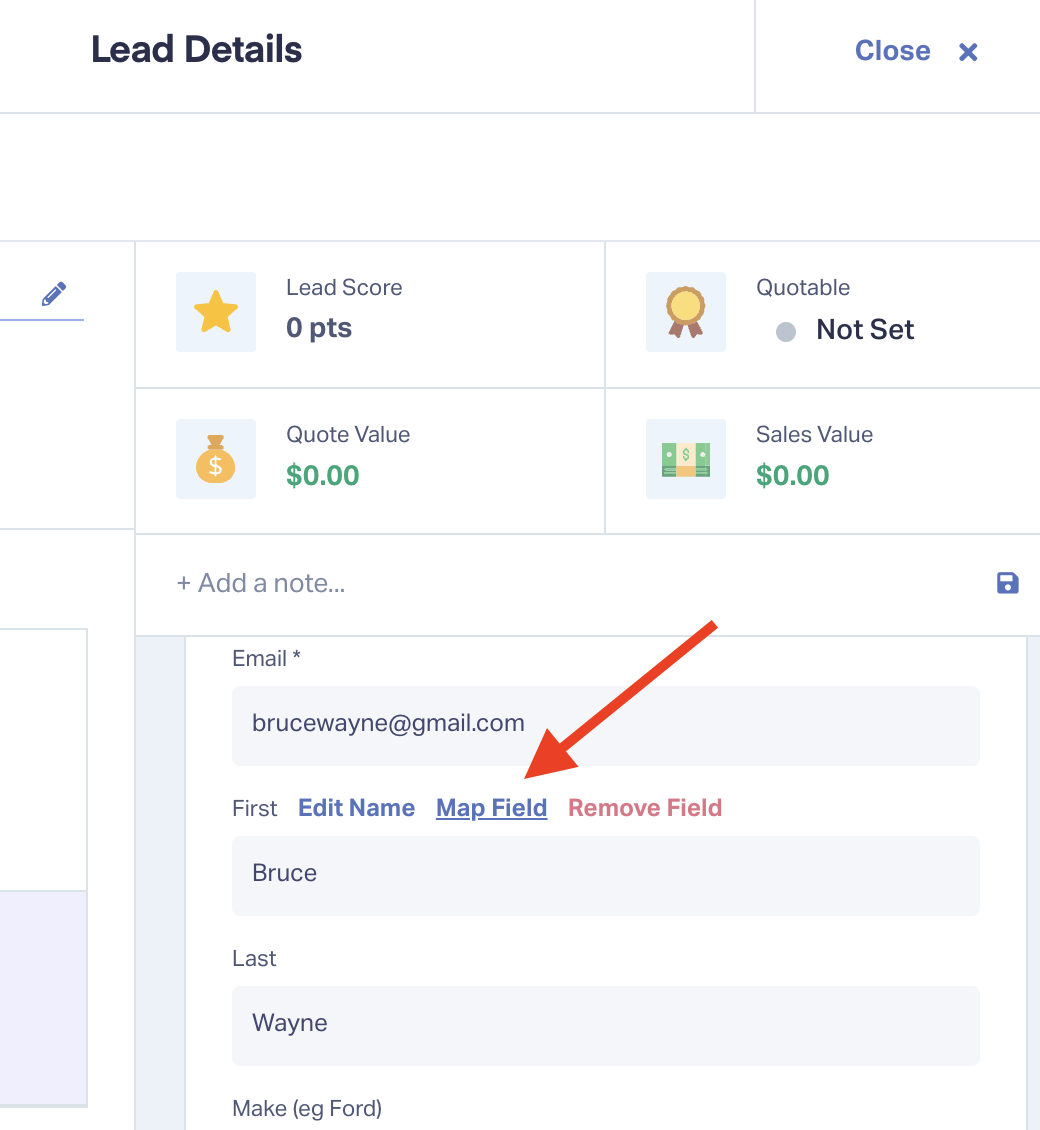
You can also add additional field mapping groups to a mapped field directly from the Lead Details page. Just hover over the field you’d like to add and click “Map Field,” then choose the field mapping you’d like to add it to. Click the save icon to finish.
If you have any questions, contact WhatConverts Support or email support@whatconverts.com
Get a FREE presentation of WhatConverts
One of our marketing experts will give you a full presentation of how WhatConverts can help you grow your business.
Schedule a Demo


