

Ninja Form Tracking
Ninja Forms is a Form Creation Tool for WordPress. In this document, we are going to show you how to track Ninja Forms inside of WhatConverts. You will first want to make sure that your WhatConverts tracking script is installed in WordPress.
1On the page where your Ninja Form is located, add the following script above the form:
<script type="text/javascript">
 function wc_track() {
 var els = document.querySelectorAll("input[id*='nf-field'][type='submit']");
 for (var i = 0, l = els.length; i < l; i++) {
 var el = els[i];
 el.classList.add("wc_ninja_btn");
 var form = el.form;
 form.classList.add("wc_ninja_form");
 }}
 setTimeout(function(){ wc_track(); }, 2000);
 </script>
2Log into the WhatConverts profile you want to use to track your form. From the top menu, select “Tracking,” “Forms,” and then “Web Forms.”

3Click the “Add Web Form” button and select “Manual Setup.”
4Name your form and set Attribute Type to “Class.” Enter the Attribute Value “wc_ninja_form”.
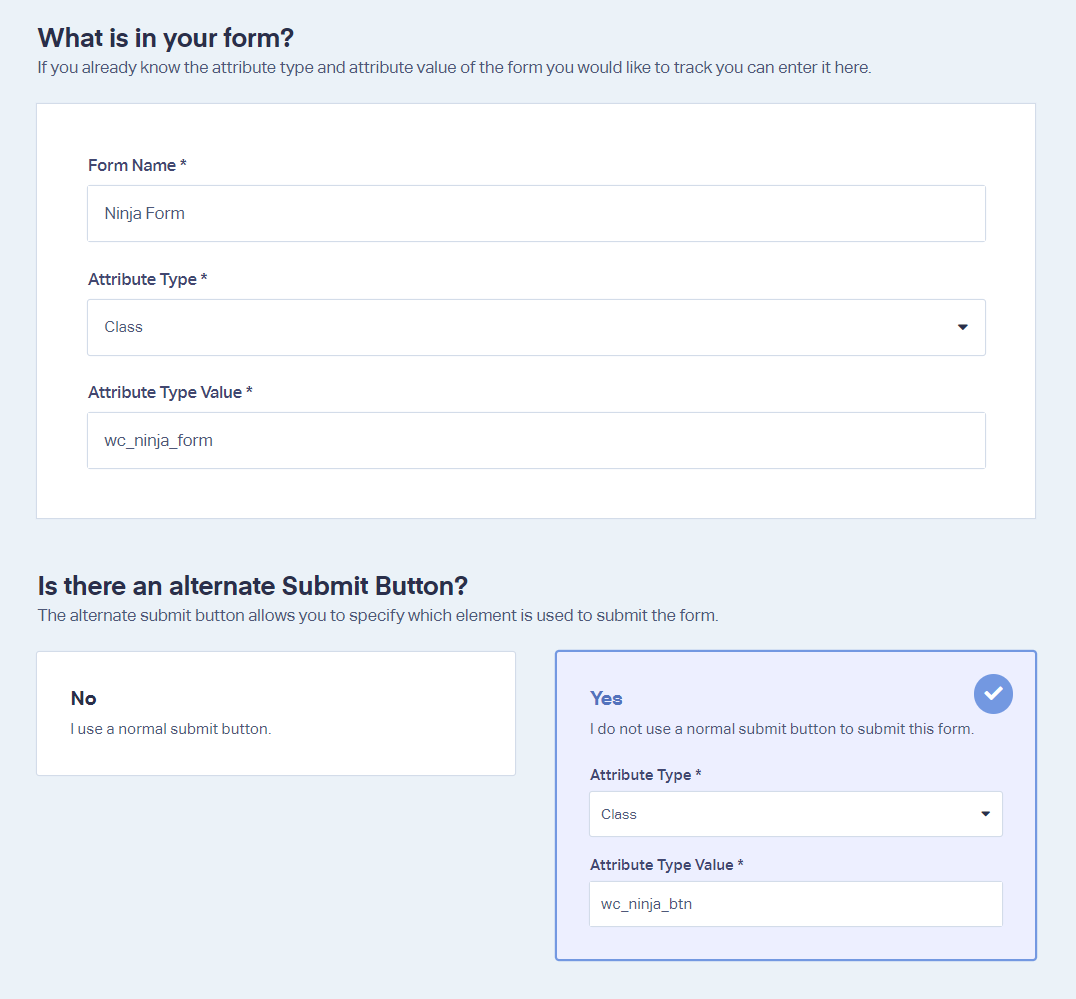
5Where it says, “Is there an alternate Submit button?” select “Yes”. Select Attribute Type “Class.” Enter the Attribute Value “wc_ninja_btn”.
If you have any questions, please contact WhatConverts Support or email support@whatconverts.com
Get a FREE presentation of WhatConverts
One of our marketing experts will give you a full presentation of how WhatConverts can help you grow your business.
Schedule a Demo


