


Track Web Forms Manually
If your web form isn’t automatically detected by the Form Finder, you can manually set up tracking by entering your form’s unique HTML attributes. Manual setup gives you full control and ensures all form submissions are properly tracked in WhatConverts.
Add a Web Form Manually
To manually track a web form:
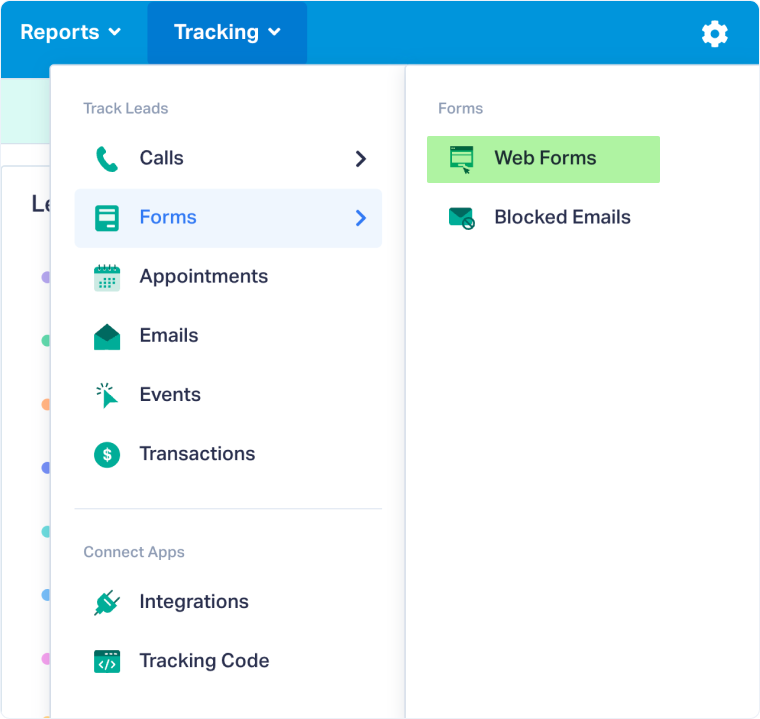
- In your WhatConverts profile, select “Tracking” from the top menu.
- Select “Forms” and choose “Web Forms”.
- Click “Add Web Form”.
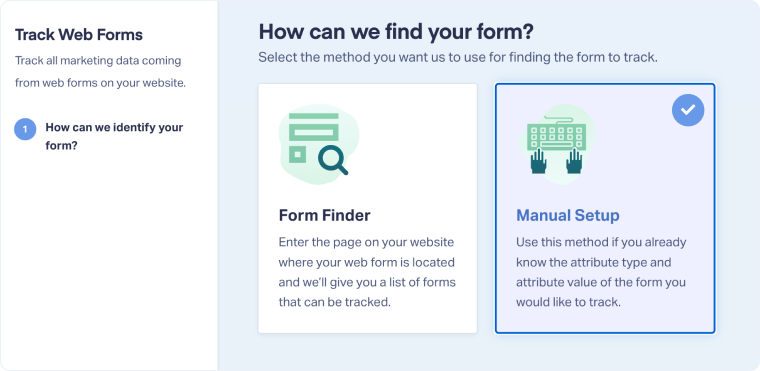
- Select “Manual Setup”.
Enter Your Form Details
On the setup screen, you’ll need to identify your form by providing its attribute type and attribute value:
- Enter a Form Name (for example, Contact Form).
- Under Attribute Type, select the identifying attribute used in your form’s HTML code. Common types include:
- id
- class
- action
- name
- title
- aria-label
- Enter the Attribute Type Value that matches what’s found in your form’s code.
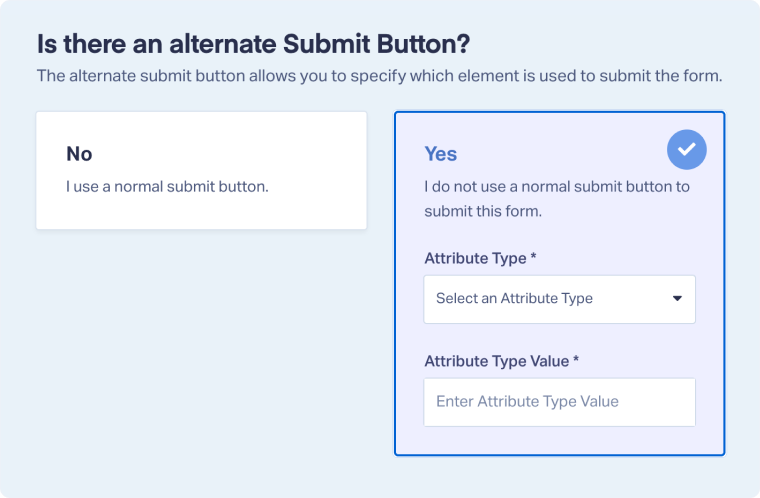
If your form uses a custom button (not a standard <button> or <input type="submit">), toggle Yes under Alternate Submit Button and specify the button element to ensure proper tracking.
Once you’ve entered your details, click “Finish” to save the setup.
Find Your Form’s Attribute
If you’re unsure which attribute your form uses:
- Visit the page on your website where the form appears.
- Right-click anywhere on the page and choose View Page Source (or press Ctrl + U / Cmd + U).
- Use the search function (Ctrl + F / Cmd + F) and type <form.
- Look for the form element and identify one of the listed attributes (id, class, etc.) to use in WhatConverts.
Related Topics
Get a FREE presentation of WhatConverts
One of our marketing experts will give you a full presentation of how WhatConverts can help you grow your business.
Schedule a Demo


