

How do I add a Verified Address?
Create a Verified Address in WhatConverts
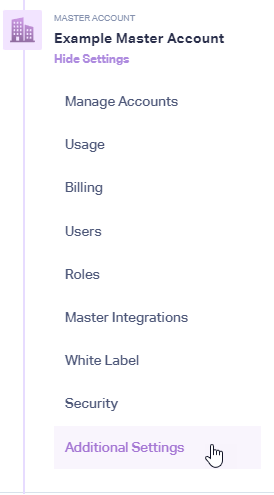
1Log into your WhatConverts Master Account. Click the "Master Account" icon and select "Additional Settings".
Select "Verified Addresses". Click "+ Add Verified Address".
2Select on the page:
- Number Type: Local, National or Toll-free
- Registered To: Choose if the numbers will be activated for a Company or Individual
Enter the Individual's or Company's information and select a "Country".
Follow the remaining prompts to add in the verification information, then upload any verification documents that are required.
Once all of the information has been filled in, click "Finish".
Note:
- It can take 1 to 2 business days to verify an address. You will receive an email once verified.
Linking your Verified Address to a Tracking Number for Activation
1Once your address has been verified, log into your WhatConverts Master Account. Click the "Master Account" icon. Select "Additional Settings".
Click "Verified Addresses" and select the "Pending Activation Numbers" tab.
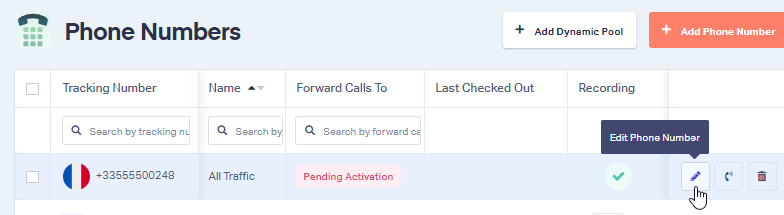
2Click "View Numbers" in the row with the number(s) that need to be verified. This will take you to the Phone Numbers page of the profile the numbers are in.
3Click the "Pencil" icon to edit the tracking phone number.
From the Verified Address drop-down, select correct address the tracking number will be used for.
Click "Finish" to activate your phone number.
If you have any questions, please contact us here: Contact WhatConverts Support or email support@whatconverts.com
Get a FREE presentation of WhatConverts
One of our marketing experts will give you a full presentation of how WhatConverts can help you grow your business.
Schedule a Demo


